Inherit from the
ionic tutorial of ccoenraets and
ngOpenFB of r-wettstaedt, this article will walk you through an example on using ionic and ngOpenFB to create an application with Facebook login.
1. To prepare your ionic environment, you can read
my article here or follow step 1 of the tutorial of ccoenraets.
2. Create an ionic application with
sidemenu template, for example:
# ionic start TestFBLogin sidemenu
You can have a look on the application (
TestFBLogin) by run the following commands:
# cd TestFBLogin
# ionic serve
3. Create Film service to query films from https://swapi.co/ (The Star Wars API):
+In the
www/js directory, create a file named
services.js
+In
services.js, define a module named
starter.services with a dependency on
ngResource. In that module, define a service named Film that uses the Angular resource module to provide access to the REST services at the specified endpoint:
angular.module('starter.services', ['ngResource'])
.factory('Film', function ($resource) {
return $resource(
'http://swapi.co/api/films/:filmId', //url
{}, // query parameters
{'query': { method: 'GET', isArray: false }} //action
);
});
+Open
index.html, add a script tag
<script src="lib/ionic/js/angular/angular-resource.min.js"></script> to include
angular-resource.min.js (right after
ionic-bundle.js) and a script tag
<script src="js/services.js"></script> to include the
services.js file you just created (right after
app.js):
4. Create
FilmsCtrl controller to manage films list view and
FilmCtrl to manage film detail view, open
www/js/controllers.js:
+Add
starter.services as a dependency to make the Film service available to the controllers:
angular.module('starter.controllers', ['starter.services'])
+Delete
PlayListsCtrl (plural), replace it with a controller named FilmsCtrl that retrieves the list of films using the Film service and stores it in a scope variable named films:
.controller('FilmsCtrl', function($scope, Film) {
Film.query(function(data) {
$scope.films = data.results;
});
})
+Delete PlayListCtrl (singular), replace it with a controller named FilmCtrl that retrieves a specific film using the Film service and stores it in a scope variable named film:
.controller('FilmCtrl', function($scope, $stateParams, Film) {
$scope.film = Film.get({filmId: $stateParams.filmId});
});
5. Create 2 templates:
films.html to display a list of films, and
film.html to display the details of a particular film:
+In the
www/templates directory, rename
playlists.html (plural) to
films.html, then replace by the below template:
<ion-view view-title="Films">
<ion-content>
<ion-list>
<ion-item ng-repeat="film in films | orderBy: 'release_date'"
href="#/app/films/{{$index + 1}}">{{film.title}}</ion-item>
</ion-list>
</ion-content>
</ion-view>
Note:
I use
$index to work around because a film doesn't have any property for indexing, it only has url property which causes difficult to get film detail info in next steps.
+ In the
www/templates directory, rename
playlist.html (singular) to
film.html, then replace by the below template:
<ion-view view-title="Film">
<ion-content>
<div class="list card">
<div class="item">
<h2>{{film.title}}</h2>
<p>Released: {{film.release_date}}</p>
<p>Director: {{film.director}}</p>
</div>
<div class="item item-body">
<p>{{film.opening_crawl}}</p>
</div>
<div class="item tabs tabs-secondary tabs-icon-left">
<a class="tab-item">
<i class="icon ion-thumbsup"></i>
Like
</a>
<a class="tab-item">
<i class="icon ion-chatbox"></i>
Comment
</a>
<a class="tab-item">
<i class="icon ion-share"></i>
Share
</a>
</div>
</div>
</ion-content>
</ion-view>
6. Create routes, open
app.js in
www/js and do as below:
+Replace the
app.playlists state with an
app.films state defined as the following:
.state('app.films', {
url: "/films",
views: {
'menuContent': {
templateUrl: "templates/films.html",
controller: 'FilmsCtrl'
}
}
})
+Replace the
app.single state with an
app.film state defined as the following:
url: "/films/:filmId",
views: {
'menuContent': {
templateUrl: "templates/film.html",
controller: 'FilmCtrl'
}
}
});
+Modify the fallback route to default to the list of films (last line in
app.js):
$urlRouterProvider.otherwise('/app/films');
+Modify the side menu, open
menu.html in
www/templates, change the Playlists menu item to below (modify both the item label and the href):
<ion-item menu-close href="#/app/films">
Films
</ion-item>
+You can test again this new modification to see the list of films, here is mine:
7. Now it's time to add
ngOpenFB to the application:
+Follow
Step 1 here to configure your Facebook App
+To install
ngOpenFB to your application, run the command:
# bower install ngOpenFB
+Install the
InAppBrowser plugin by cordova:
# cordova plugin add cordova-plugin-inappbrowser
+Move
www/lib/ngOpenFB/oauthcallback.html to
www/oauthcallback.html
+Open
www/index.html, add script tags to include
ngOpenFB.min.js (before
app.js):
<script src="lib/ngOpenFB/ngOpenFB.min.js"></script>
+Open
www/js/app.js, and add
ngOpenFB as a dependency to the starter module:
angular.module('starter', ['ionic', 'starter.controllers', 'ngOpenFB'])
+In
www/js/app.js, inject
$openFB in the
run() function declaration:
.run(function ($ionicPlatform, $openFB) {
+Call the
$openFB.init() function and set your Facebook App ID in the first line of
run() function:
$openFB.init( {appId: '<YOUR_APP_ID>'} );
8. Add Facebook login:
+Open
www/templates/login.html, add a Login with Facebook button right after the existing Log In button:
<label class="item">
<button class="button button-block button-positive" ng-click="fbLogin()">
Login with Facebook
</button>
</label>
+Open
www/js/controllers.js, and add
ngOpenFB as a dependency to the
starter.controllers module:
angular.module('starter.controllers', ['starter.services', 'ngOpenFB'])
+Inject
$openFB in the
AppCtrl controller:
.controller('AppCtrl', function ($scope, $ionicModal, $timeout, $openFB) {
+Add the
fbLogin function in the
AppCtrl controller (right after the
doLogin function):
$scope.fbLogin = function () {
$openFB.login({scope: 'email,public_profile,user_friends'})
.then(function(token) {
// log in successful
console.log('Facebook login succeeded');
$scope.closeLogin();
// send token to your server
}, function(err) {
// error logging in
alert('Facebook login failed');
});
};
9. Display Facebook user profile:
+Create a template for the user profile view. In the
www/templates directory, create a new file named
profile.html and implement it as follows:
<ion-view view-title="Profile">
<ion-content class="has-header">
<div class="list card">
<div class="item">
<h2>Name: {{user.name}}</h2>
<p>Gender: {{user.gender}}</p>
</div>
<div class="item item-body">
<img src="http://graph.facebook.com/{{user.id}}/picture?width=180&height=180"/>
</div>
</div>
</ion-content>
</ion-view>
+Create a controller for the user profile view. Open
www/js/controllers.js, and add the following controller:
.controller('ProfileCtrl', function ($scope, $openFB) {
$openFB.isLoggedIn()
.then(function(loginStatus) {
// if logged, let get user info
$openFB.api({path: '/me'})
.then(function(user) {
$scope.user = user;
}
, function(err) {
alert('Facebook error: ' + err);
});
} , function(err) {
// not logged in
alert('Please use Facebook login!');
});
})
+Create a route for the user profile view. Open
www/js/app.js, and add the following route:
.state('app.profile', {
url: "/profile",
views: {
'menuContent': {
templateUrl: "templates/profile.html",
controller: "ProfileCtrl"
}
}
})
+Open
www/templates/menu.html, and add the following menu item:
<ion-item menu-close href="#/app/profile">
Profile
</ion-item>
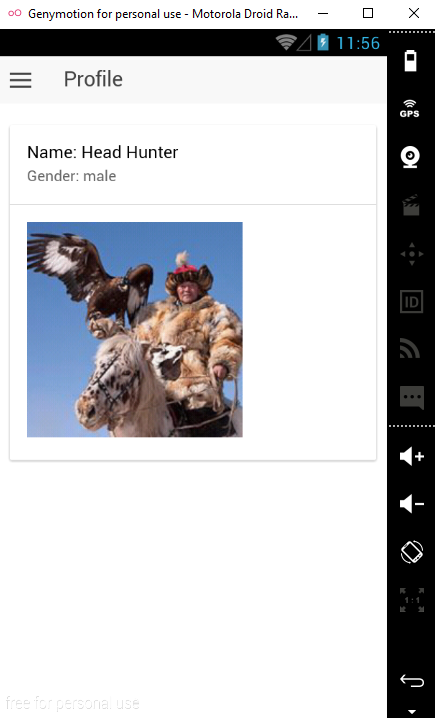
+Let test again your application to see if it works, here is my application in Profile page:
10. Build and test in real device or emulator
+iOS:
# ionic platform add ios
# ionic build ios
# ionic run ios
+Android:
# ionic platform add android
# ionic build android
# ionic run android
Here is my Android version:
You can download its source code from
my GitHub.
That's all. Welcome any comments!