In this post, I'll show you step by step to create a chat bot using Luis on Azure Bot Service. You will see how it is easy.
Before jumping to steps, I want to introduce the bot app architect with Microsoft Bot Framework (MBF) as the following picture:

MBF has 2 important parts: Bot Builder and Bot Connector. Bot Builder helps you build your bot with ASP.Net or Node.js and Bot Connector will help your bot connect with other messengers, website or email to send or receive message. Luis will provide a capacity of understanding natural language for your bot. You also can connect your bot with other machine learning service to make it more intelligent.
That's enough for the theory, let practice.
1. Go to your Azure Portal and create new Bot Service

Choose Bot Service as above picture then click Create button. Next fill in your bot name (app name), resource group and location :

After waiting for Azure finish creating the bot, search its name again and choose it. Azure will ask you Create Microsoft App ID and Password. Let click this button and it will navigate to MBF to create new bot app id and password:

Then click Generate an app password to continue button, let copy app id & the password generated:


Click Finish and go back to Bot Framework button, copy the password generated into password box. Then scroll down, in section Choose a language I choose NodeJS because I'm familiar with it. Continue to move down and select Language understanding (Luis) and click Create bot button:

It will show a confirmation box for creating a blank Luis application and connect it to your bot:

Let click OK button and wait for few minutes, then you will see the source code of your bot. Below is a sample:

By default main source code is in the file index.js, you can edit its source code and save on this window. On right side, you will see a Chat box (if you don't see, let click Test button on right top corner ). You can type your message there and see what it replies.
You also can see the endpoint of your bot in SETTINGS page, let copy it for testing in the emulator later:

Next step, I'll show you how to integrate its source code to your local repository.
2. To integrate the source code of your bot with local, click SETTINGS link and configure Continuous integration:

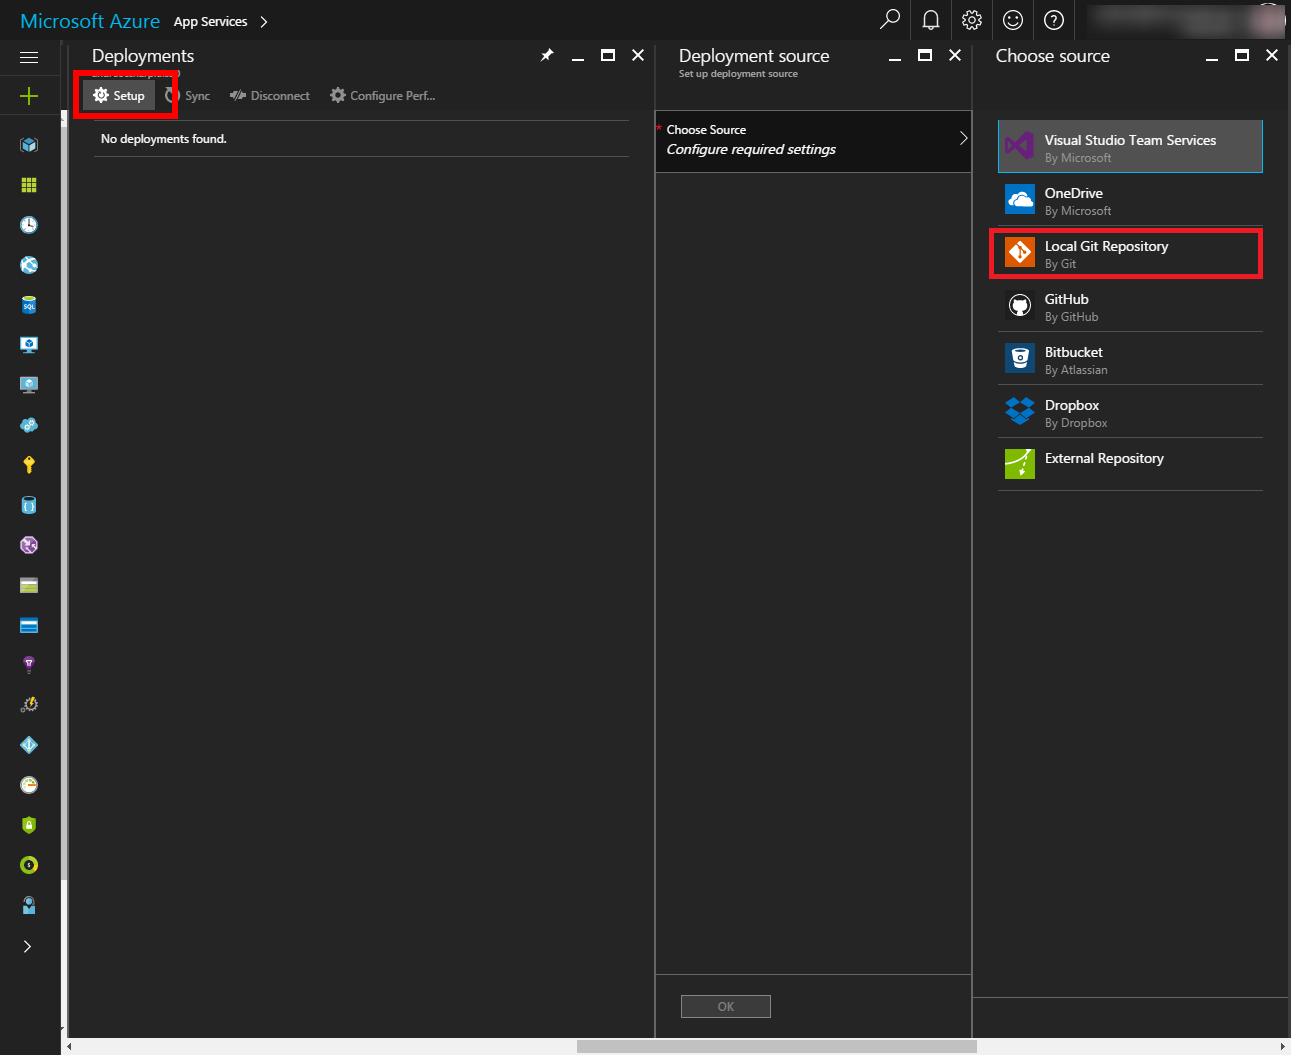
In next window, you must key an username & password which are used for the Git:


Let copy Git clone url, it will be used to link your local Git with the Git on Azure.
On your local computer, extracting the Zip of your bot source code (downloaded in above) into a folder. Assuming that you installed Git on your local computer. Change to inside the folder, run the following commands to create your local Git repository and link it with remote Git on Azure:
#git init
#git add -A
#git commit -m "<your message, e.g. my first azure bot>"
#git remote add azure https://<it is git clone url on azure>.git
#git push azure master
You will be prompted for the password you created earlier, let key in. Now you can develop your bot on the local as a normal Git project.
Yeah! It's ready for developing the bot. I often use Visual Studio Code for coding NodeJS project with Git. Here is the source code on VSC:

In next step, I'll show you how to use Bot Framework Emulator for testing the bot in your local.
3. Download he latest setup exe file of Bot Framework Emulator from this link: https://github.com/Microsoft/BotFramework-Emulator/releases. Then install it. Open it after installation:

Download ngrok (a tunneling software to connect to your bot that is hosted remotely, without it you only can send message to your bot but can not receive message from the bot). Click App Settings menu to point to the ngrok.exe file and click Save button:


And you can try, watching Log windows for debug information:

That's it. You already had basic weapons for building your bot. In next article, Part 2, I'll show you how to define a Luis app and use it in your bot. You also can find out how to connect your bot to Facebook in Part 2.
Any comment is welcome. Thank you!
Hung Le