Step 1: start your project
#ionic start ionic-auth-jwt-sample blank --v2 --ts
Step 2: add angular2-jwt. I use version @0.1.12 because the latest version of angular2-jwt has problem with latest version of ionic 2 + angular:
#cd ionic-auth-jwt-sample
#npm install angular2-jwt@0.1.12
Step 3: install authenticate server
+Copy the source code from here
+Go to the folder copied, run the server
#npm install
#node server.js
Step 4: generate AuthService and modify its code
#ionic g provider AuthService
Then edit file app/providers/auth-service/auth-service.ts as below:
import {Injectable} from 'angular2/core';
import {Http, Headers} from 'angular2/http';
import {Storage, LocalStorage} from 'ionic-angular';
import {JwtHelper, tokenNotExpired} from 'angular2-jwt';
import 'rxjs/add/operator/map';
@Injectable()
export class AuthService {
LOGIN_URL: string = "http://localhost:3001/sessions/create";
SIGNUP_URL: string = "http://localhost:3001/users";
contentHeader: Headers = new Headers({"Content-Type": "application/json"});
local: Storage = new Storage(LocalStorage);
jwtHelper: JwtHelper = new JwtHelper();
user: string;
error: string;
constructor(private http: Http) {
let token = localStorage.getItem('id_token');
if (token) {
this.user = this.jwtHelper.decodeToken(token).username;
}
}
public authenticated() {
return tokenNotExpired();
}
login(credentials) {
return new Promise((resolve, reject) => {
this.http.post(this.LOGIN_URL, JSON.stringify(credentials), { headers: this.contentHeader })
.map(res => res.json())
.subscribe(
data => {
this.authSuccess(data.id_token);
resolve(data)
},
err => {
this.error = err;
reject(err)
}
);
});
}
signup(credentials) {
return new Promise((resolve, reject) => {
this.http.post(this.SIGNUP_URL, JSON.stringify(credentials), { headers: this.contentHeader })
.map(res => res.json())
.subscribe(
data => {
this.authSuccess(data.id_token);
resolve(data)
},
err => {
this.error = err;
reject(err)
}
);
});
}
logout() {
this.local.remove('id_token');
this.user = null;
}
authSuccess(token) {
this.error = null;
this.local.set('id_token', token);
this.user = this.jwtHelper.decodeToken(token).username;
}
}
Step 5: generate LoginPage and WorkPage
#ionic g page Login
#ionic g page Work
Then edit file app/pages/login/login.ts as below:
import {Page, NavController} from 'ionic-angular';
import {AuthService} from '../../providers/auth-service/auth-service';
import {WorkPage} from '../work/work';
@Page({
templateUrl: 'build/pages/login/login.html',
})
export class LoginPage {
authType: string = "login";
constructor(private auth: AuthService, private nav: NavController) {
}
login(credentials) {
this.auth.login(credentials).then(
(success) => {
this.nav.setRoot(WorkPage);
},
(err) => console.log(err)
);
}
signup(credentials) {
this.auth.signup(credentials).then(
(success) => {
this.nav.setRoot(WorkPage);
},
(err) => console.log(err)
);
}
this.auth.signup(credentials).then(
(success) => {
this.nav.setRoot(WorkPage);
},
(err) => console.log(err)
);
}
}
Edit file app/pages/login/login.html as below:
<ion-navbar *navbar>
<ion-title>Login</ion-title>
</ion-navbar>
<ion-content class="login" *ngIf="!auth.authenticated()">
<div padding>
<ion-segment [(ngModel)]="authType">
<ion-segment-button value="login">
Login
</ion-segment-button>
<ion-segment-button value="signup">
Signup
</ion-segment-button>
</ion-segment>
</div>
<div [ngSwitch]="authType">
<form *ngSwitchWhen="'login'" #loginCreds="ngForm" (ngSubmit)="login(loginCreds.value)">
<ion-item>
<ion-label>Username</ion-label>
<ion-input type="text" ngControl="username"></ion-input>
</ion-item>
<ion-item>
<ion-label>Password</ion-label>
<ion-input type="password" ngControl="password"></ion-input>
</ion-item>
<div padding>
<button block type="submit">Login</button>
</div>
</form>
<form *ngSwitchWhen="'signup'" #signupCreds="ngForm" (ngSubmit)="signup(signupCreds.value)">
<ion-item>
<ion-label>Username</ion-label>
<ion-input type="text" ngControl="username"></ion-input>
</ion-item>
<ion-item>
<ion-label>Password</ion-label>
<ion-input type="password" ngControl="password"></ion-input>
</ion-item>
<div padding>
<button block type="submit">Signup</button>
</div>
</form>
</div>
<div padding>
<p *ngIf="error" class="error">{{ error._body }}</p>
</div>
</ion-content>
Edit file app/pages/work/work.ts as below:
import {Page, NavController} from 'ionic-angular';
import {AuthService} from '../../providers/auth-service/auth-service';
import {LoginPage} from '../login/login';
@Page({
templateUrl: 'build/pages/work/work.html',
})
export class WorkPage {
constructor(private auth: AuthService, private nav: NavController) {}
logout() {
this.auth.logout();
this.nav.setRoot(LoginPage);
}
}
Edit file app/pages/work/work.html as below:
<ion-navbar *navbar>
<ion-title>Work</ion-title>
</ion-navbar>
<ion-content padding class="tools">
<div *ngIf="auth.authenticated()">
<div padding>
<h1>Welcome {{ auth.user }}! Let do your job then Logout.</h1>
<button block (click)="logout()">Logout</button>
</div>
</div>
</ion-content>
Step 6: edit file app/app.ts
import {App, Platform} from 'ionic-angular';
import {StatusBar} from 'ionic-native';
import {LoginPage} from './pages/login/login';
import {Http} from 'angular2/http';
import {AuthHttp, AuthConfig} from 'angular2-jwt';
import {provide} from 'angular2/core';
import {AuthService} from './providers/auth-service/auth-service';
@App({
template: '<ion-nav [root]="rootPage"></ion-nav>',
providers: [
provide(AuthHttp, {
useFactory: (http) => {
return new AuthHttp(new AuthConfig, http);
},
deps: [Http]
}),
AuthService
],
config: {}
})
export class MyApp {
rootPage: any = LoginPage;
constructor(platform: Platform) {
platform.ready().then(() => {
StatusBar.styleDefault();
});
}
}
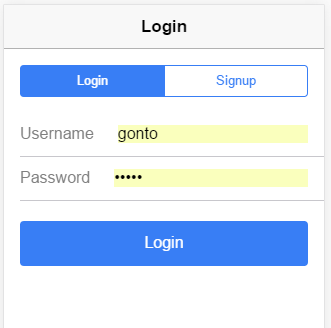
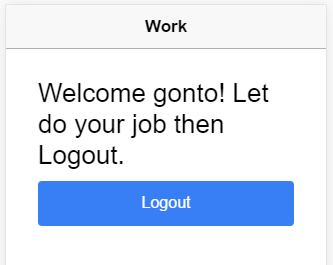
Step 7: start the app and check.
#ionic serve
Below are my captured images:
Update: if you care, here is new article for improving signup form with FormBuilder & Validator.
Happy coding! Any comment are welcome.


